
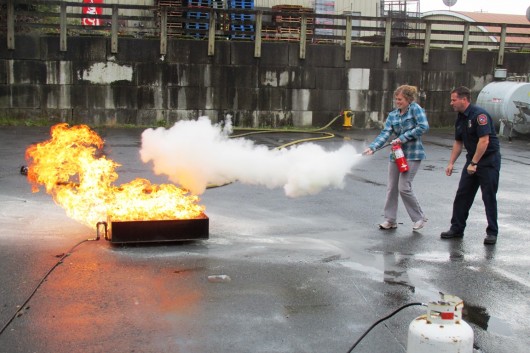
KRBD’s intern, Megan Petersen, practices putting out a controlled fire with an extinguisher.
Many people have never used a fire extinguisher. Even if we read the instructions, it’s not the same as actually using one on a real fire. This fall, two Ketchikan nonprofit organizations got together with local firefighters to get some hands-on training.
In a perfect world, none of us will ever need to use a fire extinguisher. But we all know the world isn’t perfect, so it’s recommended that we at least prepare for the possibility.
Terry Roberts is a a firefighter/paramedic with the City of Ketchikan Fire Department. He and firefighter Frank Divelbiss showed employees of KRBD and the Ketchikan Area Arts and Humanities Council the basics of how to use a fire extinguisher.
And for those who think extinguishers are easy: Well, it’s not quite a point-and-shoot operation. For starters, you need to make sure you have the right fire extinguisher for the job.
“The classification of fire extinguishers corresponds to the four classes of fires: A, B, C and 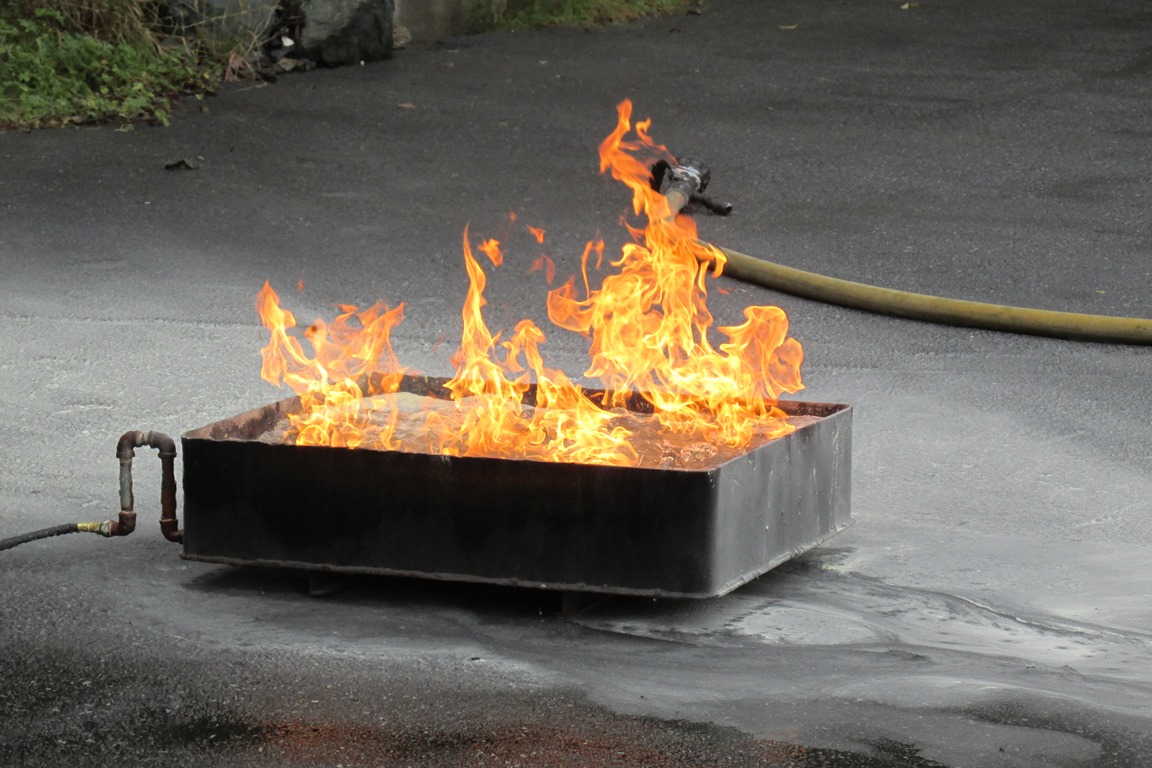 D,” is how the instructional videotape begins.
Yes, I said videotape. It was a vintage VHS, but Roberts said it is all still relevant information. So, ready for the different classifications?
- A Class A fire involves normal combustible material, such as paper or wood.
- Class B fires involve flammable and combustible liquids and gases, such as gasoline, oil and alcohols.
- Class C fires are when electric equipment is on fire, but only if the electric current is still present. So, if your computer is on and catches on fire, it’s a Class C; If you unplug it, the fire becomes Class A.
- And Class D fires involve combustible metals, such as aluminum, magnesium and sodium.
Fire extinguishers are clearly marked to indicate which fires they are designed to control. Some are made for multiple kinds of fires, and for different intensities.
The first step to use any of them, though, is to get it off the wall.
“If you’ve never done it before and you don’t know there’s a clasp on there – there’s a little latch – and you’re excited, you’re in a hurry, you grab it and you’re going to wind up ripping the screws right out of the wall,” Roberts said. “Which, if you can do that, that’s great. It will still work with the mounts attached to it.”
Frank Divelbiss, left, and Terry Roberts give a visual demonstration of the three prongs of a fire: heat, fuel and oxygen.
But, it’s a smoother process if you just practice releasing the latch.
The second step is to break the seal, which is easy if you take the loop handle of the small pin and twist it. Once the seal is broken, the pin slides out and the extinguisher can be used. Roberts stressed that we should pick up the extinguisher with our non-dominant hand, so we can use our dominant hand – in my case, my right – to direct the hose.
There’s a handy acronym for how to use a fire extinguisher: PASS. That stands for Pull the pin, Aim, Squeeze and Sweep. Sweeping the spray is important, to cover all sides of the fire and to push it back. There’s another step, though, that Roberts has added to the process: Alert. Which means: Let everyone know there’s a fire.
“(Yell) Fire! Fire! Fire! As loud as you can. Three times,” he said. “Just shout it out.”
And we did.
After all the prep work, we were ready for some hands-on fun. Divelbiss started a controlled fire in the parking lot behind the fire station, and we each took a turn or two putting it out, guided by Roberts.
As fun as the training was, Roberts and Divelbiss stressed that we are not firefighters. Extinguishers are for safety, and to buy us time. So, if there’s a fire, we now know how to use our extinguishers to clear a way for everyone to get out of the building as quickly as possible, and then call for the professional firefighters.


